Easy Ways to Upgrade Workbench in Valheim Game
Valheim is a Survival game set in a dangerous open world. This game offers us various survival options in its natural world through Crafting elements. Before we craft, there is an object in the form of a Structure that we need to craft in order to make other complex items. On this occasion we will provide useful tips for those of you who are playing this game for the first time. Here’s an easy way to Upgrade WorkBench in the Valheim game.
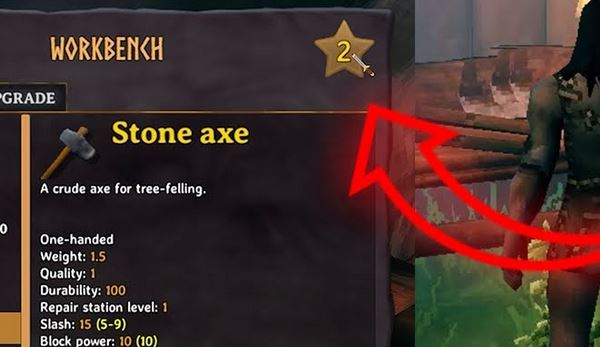
As we already know, Valheim offers various types of items in the form of tools, weapons, armor, to cooking food. But to get this item we need one thing they call Recipes. As the name suggests, this recipe is useful for crafting items that we will need later. Workbench is useful for processing these recipes into finished objects with the help of the main ingredients. Each WorkBench Level will later offer different types of Recipes.
PC/Laptop Specifications To Play Rise of the Tomb Raider
How to Make a Workbench
When you first enter World Valheim, we have nothing but clothes. Before getting various complex items in this game, you have to start grinding and look for raw materials. You have to look for stones, wood, to food. Next the first thing you need to create are some helper structures like CampFire and WorkBench. Here are the materials you need to make Workbench and Camp Fire.
- CampFire
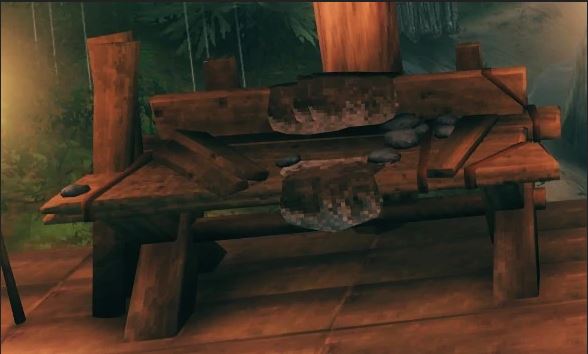
- Level 1: Craft a Workbench
You can now create WorkBench level 1. But you need to remember, you have to place WorkBench in a closed indoor area complete with a roof and walls. You have to do this because every wooden object that is present in the Valheim game can be damaged if it is exposed to rain. So make sure you first build a house using a Hammer, or find a decent house to live in that is scattered throughout the game world.
How to Upgrade WorkBench Valheim
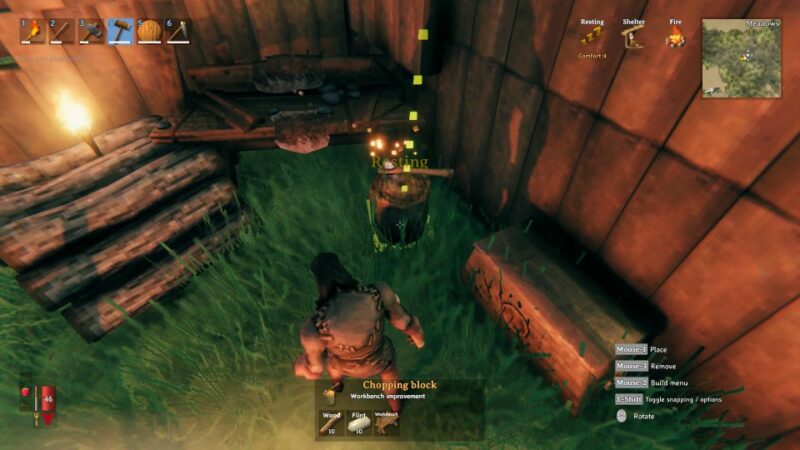
Actually to upgrade to Workbench is very easy. All you need to do is build some other Support Structure objects in an area close to your WorkBench. An example is if you want to upgrade WorkBench level 2, then all you need to do is make chopping block. However chopping block you have to place this close to Workbench Level 1.
When you have done these tips, then your WorkBench Level 1 will upgrade automatically using Chopping Block which you have built right next to it. You have to do this in a closed room too. To find out the radius of the WorkBench with the structure you built, later the structure will have a green color. If it’s too far away it will have a red color and you can’t put it.
Here are the materials you need to use to upgrade WorkBench. You can find some of these materials depending on how long you have played the Valheim game.
- Level 2: Craft a chopping block
- Level 3: Craft a tanning rack
- 10x wood
- 15x flint
- 20x leather scraps
- 5x deer hide
- Level 4: Craft an adze
- 10x fine wood
- 3x bronze
- Next to Forge
- Level 5: Craft a tool shelf
- 4x iron
- 10x fine wood
- 4x obsidian
- Next to Forge

That’s all our tips on how to easily Upgrade WorkBench in the Valheim game. what do you think, easy enough right? Hopefully these tips can be useful for those of you who are playing the Valheim game for the first time. If you are interested, you can play Valheim on Windows, Mac, and Linux platforms. You can enjoy this game directly on the Digital Steam platform. Don’t forget to also visit our review of the Valheim game.
Post a Comment for "Easy Ways to Upgrade Workbench in Valheim Game"