Here's How to Easily Overcome Banned Devices on Free Fire!
Through the Gamedaim Guide Writing Series, this time we will tell you how to “Overcoming Banned Device Free Fire” or way “Overcoming Unbanned Device Free Fire”. Yes, because we think this problem is also one of the things that Free Fire players in Indonesia look for the most. What’s more, this will really help you to be able to play the Free Fire game again.
Games Free Fire it is undeniable that it can compete with popularity PUBG Mobile. Because, a lot of people try to play this game and are addicted to it and can’t escape it. Game genre Battle Royale it is undeniable that it has a very active community. So it’s not surprising that so many people need Free Fire tips.
Well this time we will give you tips or how to easily overcome Banned Device on Free Fire. What’s more, you will be able to play your Free Fire account again. What’s more, it’s very easy, you have to follow Tutorial How to Overcome Banned Device on Free Fire Easily! Below this.
Here’s How to Easily Overcome Banned Devices on Free Fire!
Time needed: 1 hour.
How to Overcome Banned Device on Free Fire? It’s very easy, you just have to follow the tutorial that we provide below. What’s more, the tutorial that we are going to provide below is very easy to follow. What are you waiting for, here it is How to Overcome Banned Devices on Free Fire Easily! According to Gamedaim.
- Download the Application Below
Please download the required application below.
Virtual Backup
VirtualXposed 0.16.1
Changer 1.19
GameGuardian 0.70.2
Streind Space - Clear Data on Free Fire Games
The second step you have to do is clear data on the Free Fire game. To clear data, go to app settings (Settings) → Apps/Manager App/Installed apps → Select Free Fire → Clear Data.
- Open File Manager
The third step you have to do is open the file manager /File Explorer then delete the folder com.garena.msdk in internal/external memory, the location is visible when you use the Exploler application /storage/emulated/0/
- Open the VirtualXposed App
The fourth step you have to do is open the VirtualXposed Application → Go to the menu Settings → Add App → Clone Apps. Select and clone application Virtual Backup, Changer/imei changer and the Free Fire game. (Install all the applications first).
- Go to Application Settings
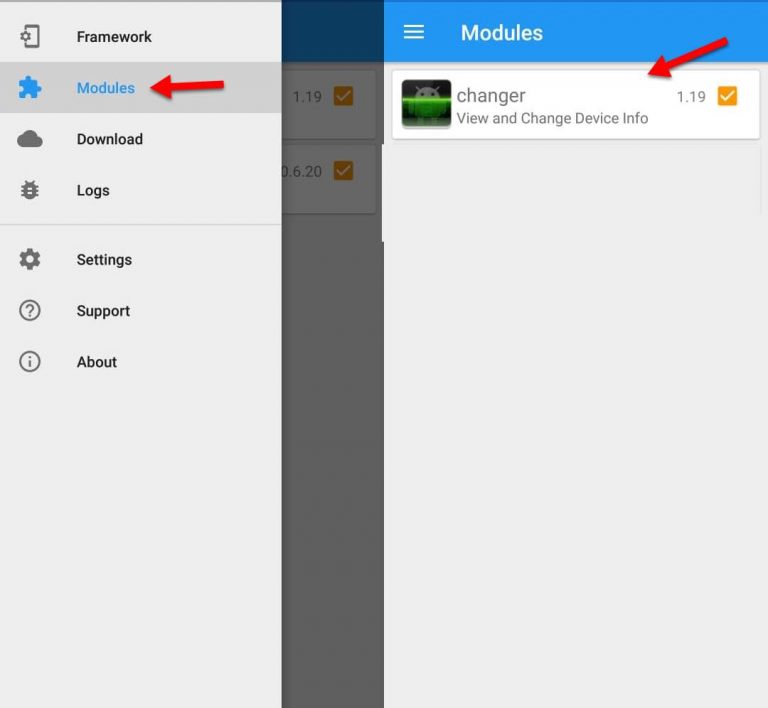
The fifth step you have to do is log in to Settings again in VirtualXposed, choose Manage Xposed Modules → Check/enable changer/imei changer. Then restart the VirtualXposed application.
- Run the Charger App
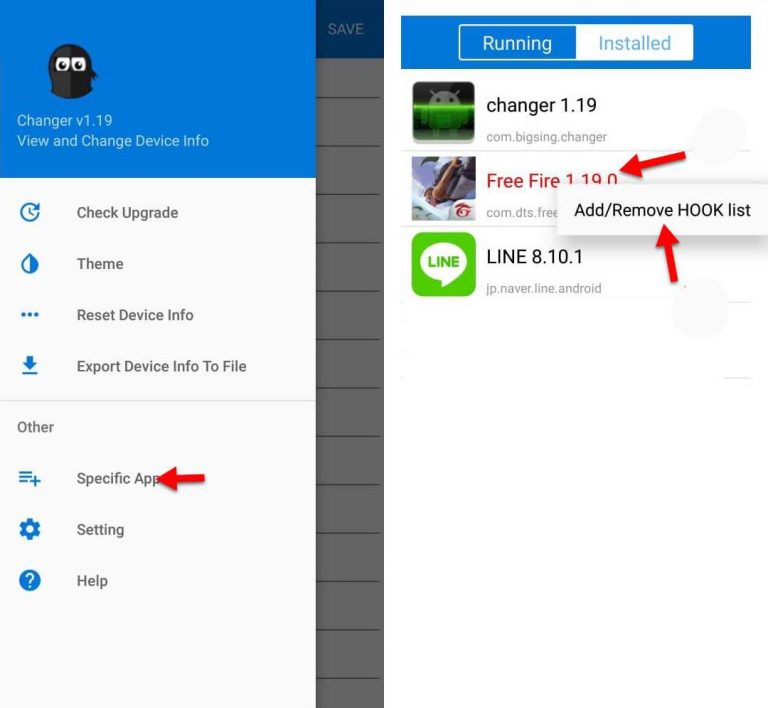
The sixth step you have to do is re-open VirtualXposed and then run the Changer application inside VirtualXposed → Select the menu in the upper left corner → Select Specific App → Tap and hold Free Fire, until you see the text Add/Remove HOOK List then select. (Free Fire writing will turn red).
- Back to Charger App Home Page
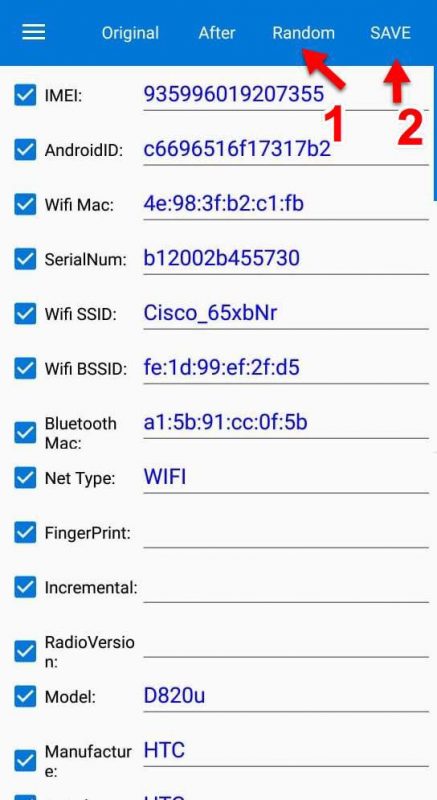
The seventh step that you have to do is return to the start page of the Changer application, there is a menu Random, select until all data info on IMEI, Android ID, etc. changes. Then SAVE. Finally, run your Free Fire game.
Still Confused? Follow the Video Tutorials Below.
https://www.youtube.com/watch?v=BrVaac8oX48
now That’s How to Easily Overcome Banned Devices on Free Fire. Hope this is useful for all of you. It should be reminded again, if you are still confused by the tutorial above, you can follow the video tutorial as above. There are still a lot of tutorials related to Free Fire which we haven’t discussed. So stay tuned Gamedaim yes.
Post a Comment for "Here's How to Easily Overcome Banned Devices on Free Fire!"